DIY Confetti Frame
It’s Jessica from J. Sorelle again. I’m happy the ladies of AVYN wanted an extra dose of craft love today, just in time for Valentine’s Day. They have been rocking the bra, mom and wonderful world of women lately, and I couldn’t be happier for them.
I’m a total sucker for love. Always have been, and I hope I always will be. I’ll be giving extra hugs and kisses to my kids, husband and loved ones this Valentine’s Day. Whether you’re celebrating with friends, kids, neighbors, co-workers or grandkids, I have a DIY confetti frame that makes every memory a party! It’s got a pinch of confetti, a smidge of craftiness, a handful of memories and a heaping amount of love and thoughtfulness. It’s the perfect recipe to make a DIY confetti frame this Valentine’s Day.
Let's get this confetti party started!

Materials:
- Protective sheets
- Fuse tool (available here)
- Confetti in various colors and shapes
- Magnets (if you want to make them magnets for the fridge)
Directions:
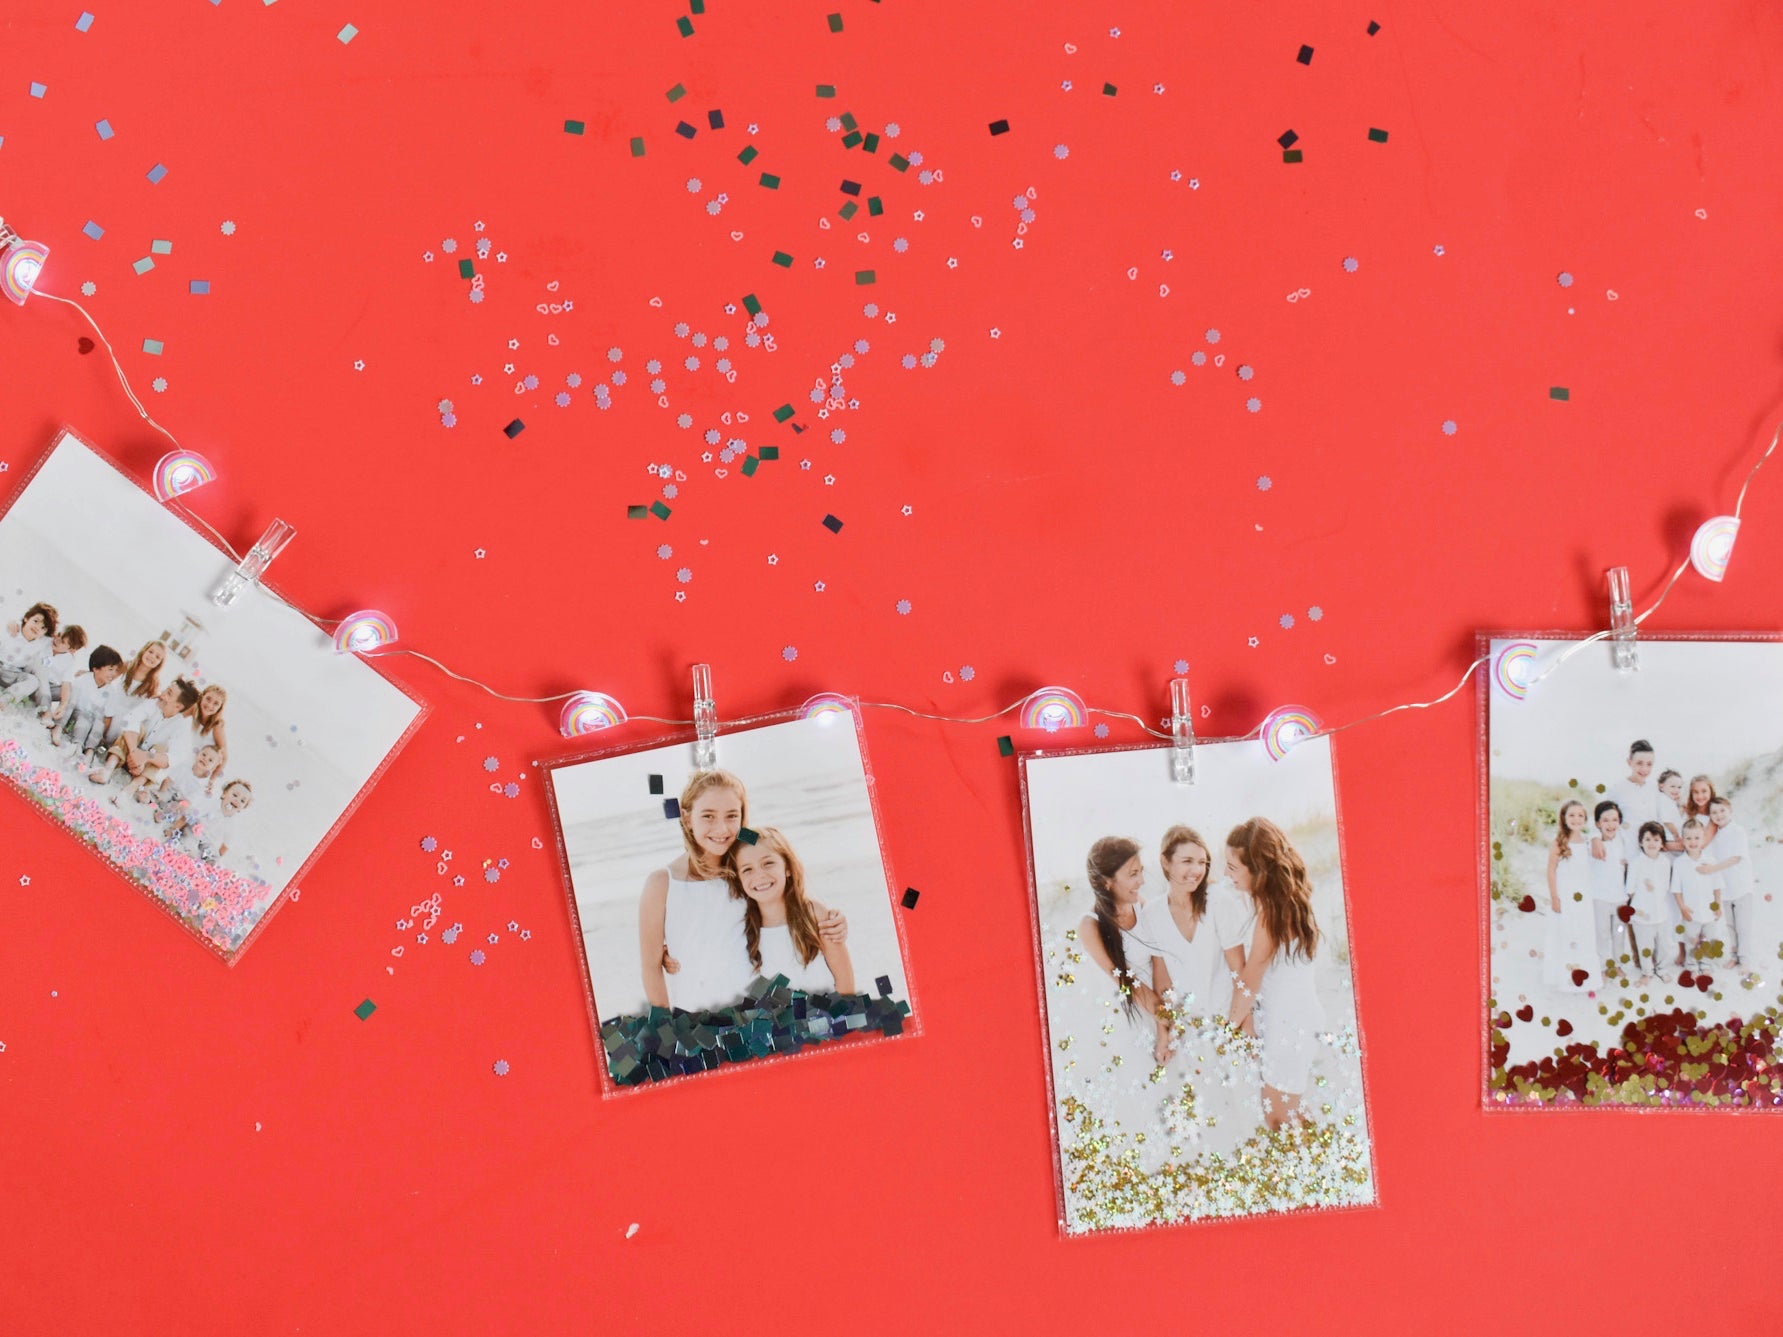
Step 1: Insert the photo inside the protective sleeve. If you want to use the least amount of sleeves as possible, be strategic about the placement of the photo. If you aren’t limited to the number of sleeves you can use, then you have ample space, and can place the photo anywhere in the sleeve.

Step 2: Set the ruler tool that comes with the fusing tool on the edge of the photo, and slide it over the edge of the photo, so you can burn a “seam” as close to the photo as possible, without touching the photo. Now begin to fuse the sides together by pressing down firmly, and rolling it from the top to the bottom of the ruler (to the corner of the photo). It’s like a pizza cutter that fuses as it moves, burning the protective sleeve together. Repeat this process on the sides and bottom of the photo, but remember to leave the top open.

Step 3: Now that you have a photo pocket, fill it with confetti. I had confetti of all kinds and shapes and colors in my art cart, and bought tiny heart confetti for an extra dose of love.

Step 4: Once it’s filled it with confetti, now it’s time to enclose the entire frame. Repeat step 2 to fuse the top and final side together so no confetti can escape.

If you want to glue a magnet to the back of it, it makes great refrigerator décor. You can tape them on walls, hang them on strands of lights. Have fun with it!

Jessica is the creative mind behind J. Sorelle, a DIY + Lifestyle blog founded by three sisters. She lives in the Rocky Mountains of Colorado with her husband and three children. She loves a good DIY, craft session, beautiful spaces (yes, she's a Joanna Gaines fan), spending a Friday night in with her family, espresso and a glass of wine shared with girlfriends. She is a regular contributor for Momtastic, and her work can also be seen on Real Simple, Home Depot and Curbly.
Keep up with Jessica & J. Sorelle on Instagram, Facebook, and Pinterest!